Hi all! I have a post today to show you how to make this pretty mixed media card. Today is my parents’ 30th Wedding Anniversary, which is the ‘pearl’ anniversary, so I wanted to make something with lots and lots of pearls. Of course you could use this style and techniques to make any sort of card you wanted, and use any papers, but I will list the items I used to help you get an idea of what is needed.
I used:
A3 cardstock
First Edition Sweet Nothings 12×12 Paper Pad
Dovecraft Distressing Tool
Paper Flowers, various colours and sizes
Clear Glass Beads
White thread
Flat back pearls (lots!)
White Gesso
3D Gloss Gel/Gel Medium
I wanted to make a huge card, so I started with A3 white card to create my card blank. The card measures 7.5″ by 8″, so you will need to cut a piece 15″ by 8″, and score down the middle to create your card blank.

Matt the front of the card with three contrasting papers, one just under 7.5 x 8″, one 7 x 7.5″, and the front one 6.75 x 7″. Distress the edges of the centre paper.
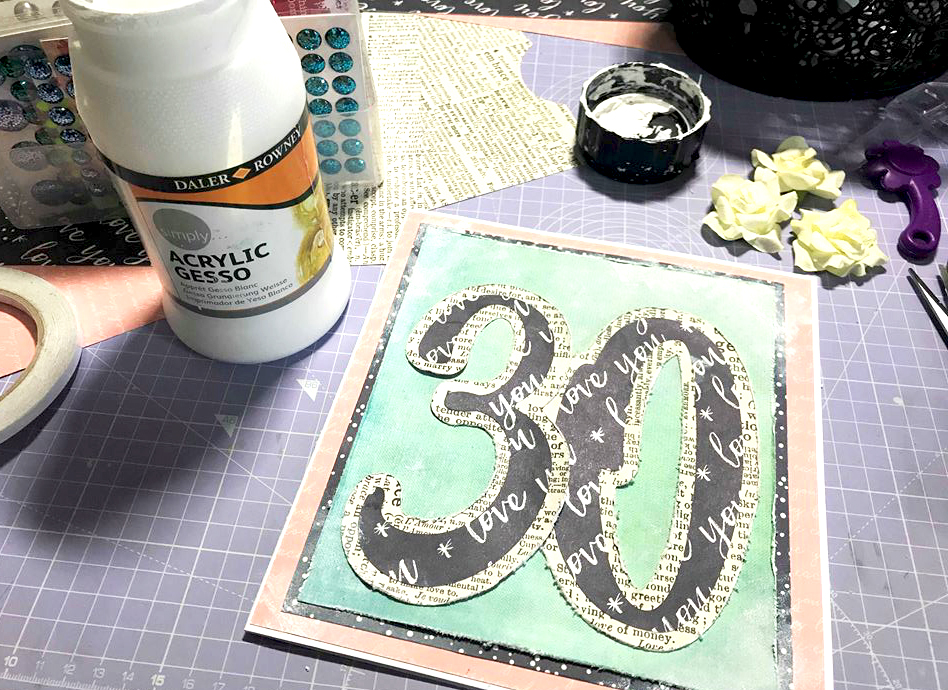
For the centrepiece, I cut the numbers on my silhouette in the font ‘Beyond the Mountains’. I offset the numbers by about 0.3″ and separated the two cut files so the darker ’30’ could be backed by the lighter one. If you do not have a silhouette or other electronic cutting machine you can print out a template and then draw and cut around it, the shapes are not too complicated so it shouldn’t take too long.

Distress the edge of the larger 30, then adhere as seen in the photo below, so the numbers slightly overlap and so still leave a border of the green paper underneath. Also so there isn’t an awkward bit of green poking out where the number three ‘dips’ inward on the right edge.

Now it’s time for the messy bit, start by lightly sponging some white gesso on the corners of the card:
Gather together all your embellishments ready to put on. I also cut the ‘mum and dad’ with my silhouette with pearlescent paper (PEARLescent, geddit?!).

Add the gel medium (or other adhesive, you basically want something that will dry transparent with a gloss finish) in the first corner you’re embellishing.

Then add the thread, loop it around your fingers, make knots, whatever you like. It will look messy at first but works once all the items are in place and gives a lovely shabby-chic look.

Then start adding the rest of your embellishments! You may need to add more gel as you go. Start from largest to smallest. So I started with the large paper flowers, then the smaller pink ones, then large pearls, medium pearls, etc, and finish with the glass beads and tiny pearls to fill in any gaps.


If adding a small title or sentiment like I did with the ‘mum and dad’ cut, then add this at the very end.
Finish by painting a light layer of gesso over the flowers to help tie them in to the theme of the card – if your flowers are white or ivory you may not need to do this, but mine had a hint of yellow which I wanted to hide.

The gesso layer also contributes to the shabby-chic effect.
You can dry with a heat tool but I find it better with all these embellishments to leave it overnight to dry.
And it’s finished! One thing to remember with this card, make sure you have an envelope, or the equipment to make an envelope, that is big enough, as it is a BIG card!

Thank you so much for reading. If you make your own version of this card then I’d love to see it, so please tag me on social media! Let me know if you have any questions, and if you’re a bit new to or confused by mixed media, then I have a Mixed Media Basics video up on my YouTube channel (it’ll be published a few hours after this blog post), there’s a link to my channel up at the top of this page underneath my logo.
Grace / ms.paperlover ❤