A few weeks ago I launched a new collection in my etsy store, Rainbow Doodles. Just fun and simple shapes, colourful with simple doodles on top. Great for art journaling, and creating layers and clusters in your creative projects.
Now that many of us are in isolation or lockdown, I wanted to share something to help in a tiny way. So here you can download two free printable sheets of this collection to use at home in your own projects. Staying busy and staying creative is important at the moment.
These pictures were made with the stickers and die cuts available in my shop, but gives you some idea of how you can use these in projects.
Just a couple of things before you download:
These free printable downloads are solely intended for personal use. They are not to be reproduced in any way to be distributed or sold.
These designs are purely my own creation, and are not to be reproduced.
If you use these in your projects, then I’d love to see, so please tag me on social media if you share. All my social media links are at the top of the page.
To go along with this week’s Trimcraft Tuesday video, where I make a baby-themed scrapbook/mini album, here are the instructions on how to make the album.
You can watch the accompanying video here:
This album is one I’ve made many times, based on this video from YouTube (I’m not clever enough to come up with these ideas from scratch!), but I have adjusted the measurements, which is why we have this blog post!
You will need:
Chipboard, or other very sturdy card (I’ve used old ‘do not bend’ envelopes in the past and they work just fine!)
A3 white card/cardstock ( I used 210 gsm)
A4 white card/cardstock
Double Sided Tape
Strong Glue
Red Line Tape
Scoreboard and bone folder
Ruler or t-square
Start by cutting your board, two pieces at 16.7 x 14.5 cm, and one at 3.5 x 14.5 cm.
Take your A3 card and cut down to 42 x 18.5 cm (A3 is 42cm long so you will only need to cut one side). Mark 2cm in from the edge of each side of the card, and use these marks to adhere your chipboard pieces to the card.
Mark 4mm from each corner of the chipboard, and use this mark to draw a diagonal line across the corner (to create a triangle), and cut along these lines.
Fold the card around the chipboard, using the chipboard to help bend the card, you can use a bone folder to make the folds neater. Make sure to fold the long edges first. Adhere down the long edges (you can use either double sided tape or liquid glue here, whatever you prefer).
Use the bone folder to push and fold the edges in as seen so that all the corners are neat, then fold and adhere the short edges to the chipboard.
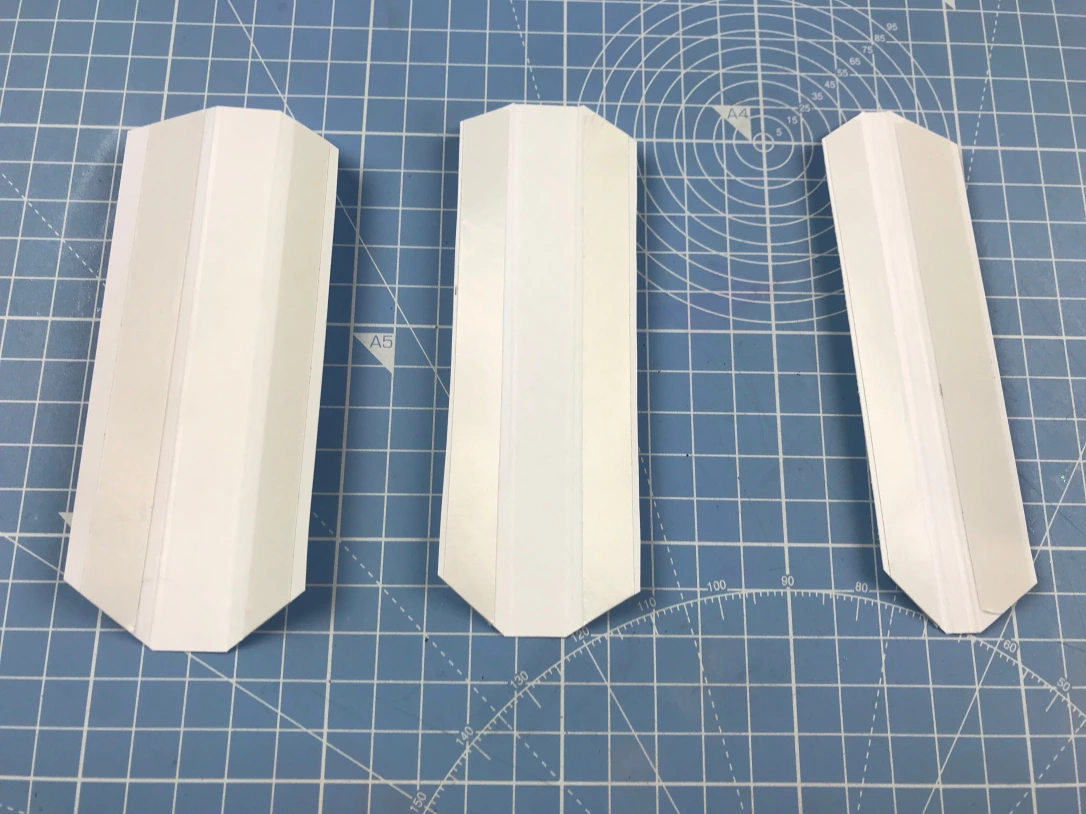
Put the album aside for now to work on the ‘binding’. Cut three pieces of card (you can use the leftover from the A3 piece you cut down for this), to 5.5 x 13, 4.5 x 13, and 3.5 x 13 cm. Score 1.5cm in on both sides of each piece, and fold and burnish the lines.
Add double sided tape to both sides of each ‘flap’ on all three pieces, then snip off all the corners. Then add adhesive to the centre of the largest piece and adhere the middle piece on top, repeat to add the smallest piece on top of the middle piece, you should end up with something like this:
Cut another piece of cardstock to 13 x 12.5 cm, on the 12.5cm side measure 5cm in from each edge, and mark at the bottom and the top. Use the marks to adhere this to the centre of the album. Then again use the marks to adhere the binding piece to this – use strong adhesive, you really want this one to stay in place!
Cut two more pieces of cardstock at 16.5 x 13 cm, and adhere these to the inside cover to cover up the chipboard.
Now we can make the pages/inserts for the album. Cut six pieces of cardstock at 27.5 x 13, and then score at 1.5 and 14.5 cm.
Fold and burnish the score lines. Then turn over and add double sided tape to the bottom ‘flap’ as seen.
Now it’s time to add these into the album, which is one of those things that on paper is really simple but SO easy to mess up! Start from the last page (on the right).
With the insert ‘open’, align the left edge to one of the binder flaps as in the photo (with the insert flap at the bottom ). Take the tape backing from the binder and stick down, then take the tape backing from the other side of the flap.
Fold in the flap from the insert, and remove the backing from this piece, then fold the insert to meet the bottom edge, and use your bone folder to seal everything in place.
Once all pages/inserts are in place, carefully bend the album like this to finish it. It is best to leave this step until the end as it’s easier to do all the other steps when the album is still flat.
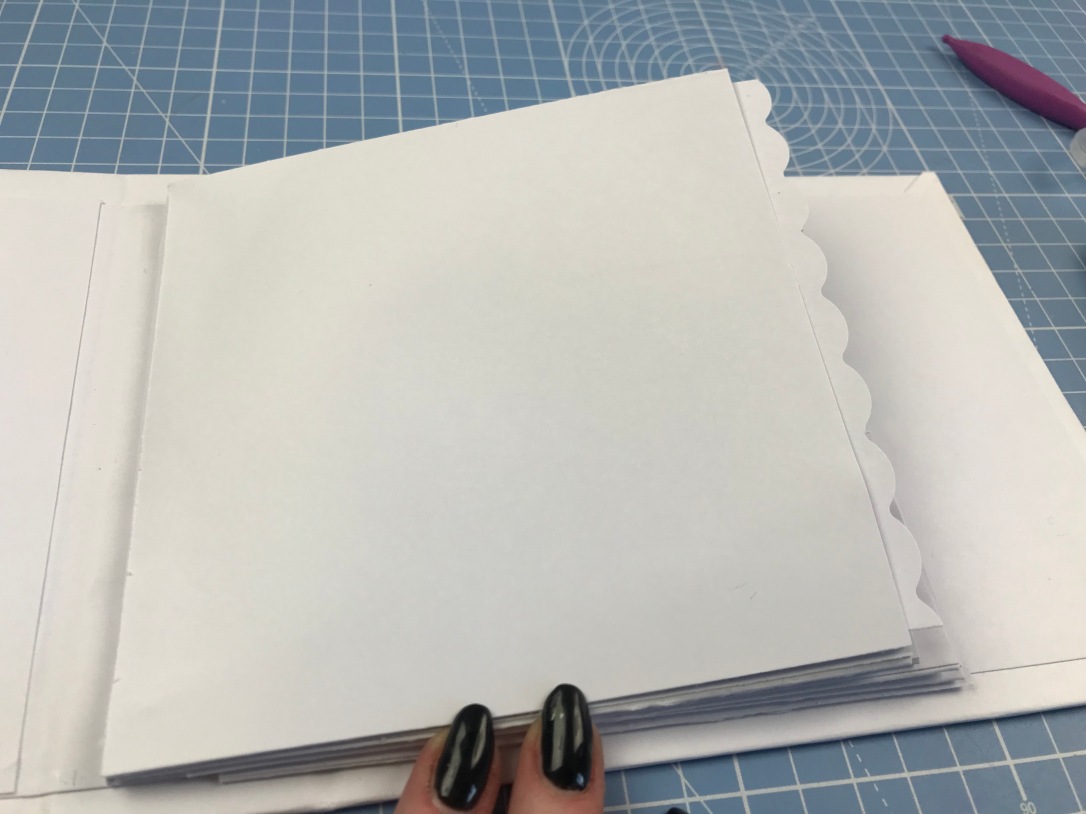
Now you just need to add in pages for each of the pockets created. Cut yardstick to 12.5 x 13 cm. On the 12.15 cm side, use a border punch (of any type, I just chose a scallop edge for this album as it works well) to add a decorative edge.
Do this six times and insert into each pocket. If you want colourful pages then cut these inserts with papers to match your theme – or you can just cover them with appropriate colours, it’s up to you.
Now you can decorate to your heart’s content! To see how I did mine, watch my video linked at the top of this post, but I’ll finish off with a picture of how mine ended up. If you’d like a product list then everything will be linked in the description box of the YouTube video 🙂
I’ve finally completed my first planner set up of the year, hooray! I’m sure a lot of you came here after watching the video, but just in case, here’s the my YouTube video sharing this set up:
Before I set this one up, however, I had worked hard on another set up, which was for my eldest sister. She requested a planner all set up like one of mine for Christmas, and I was more that happy to oblige.
One of the things she wanted in her planner were some daily inserts like she’d seen in one of my A5 planners, but I didn’t have/couldn’t find any that were quite right, so I made some!
And I liked them so much, I edited them slightly, and put them in my planner too (it’s shown in the video but for my own planner I changed the ‘to call/email’ section to ‘priorities’). Then I thought, why not share the love? So I’m sharing these inserts with you too as free printables.
before downloading these free printables, please read the information and terms and conditions at the bottom of this post.
As with all my personal size planner printables they are designed to print double sided onto A4 paper, and there are faint grey lines to show you where to cut them down to size. To print double sided select ‘flip on the short side’ in your printer settings. I also recommend setting your print quality to ‘high’. To download, simply click on the files below.
I hope you like them! Feel free to contact me (there’s a contact section at the top of the page) if you have any questions or any problems with downloading or printing. I will do my best to help but do not promise to be able to solve all problems!
Grace @ms.paperlover ❤
These free printable downloads are solely intended for personal use, and are not to be copied, redistributed, or sold in any way.
The design and layout of these inserts are purely my own creation, and are not to be reproduced.
If you do use the inserts and share them on any form of social media, please either tag me or link back to this blog, both as credit to me but also so that others who might want to use them can find them.
After releasing my 2018 Free Christmas Planner Printables, and in the accompanying video offering giveaway for sticker sheets and die cuts of the little Christmas doodles that feature in the inserts, many of you asked if I would be offering these for sale…
Well, after some deliberation about the logistics, I have decided that yes, I will be offering a limited amount for sale via email transaction. Read below to find out more and how to purchase!
If you saw the video where I announced this, please note the prices have been altered slightly after I did some more precise maths to work everything out!
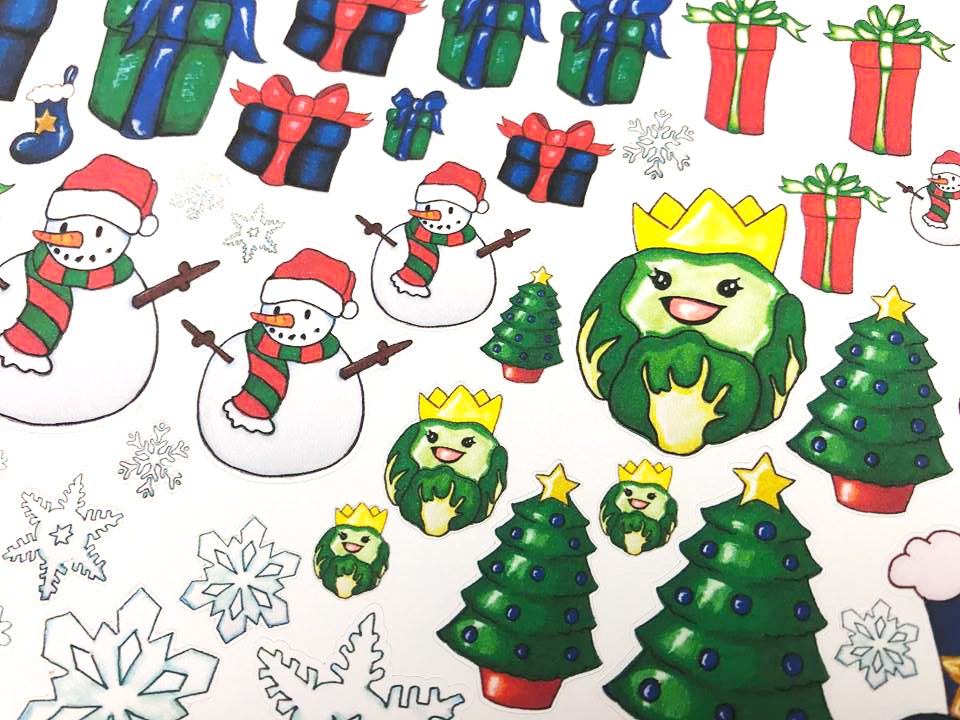
First up is the Design 1 Sticker Sheet (featuring Larry the Happy Sprout!):
This sticker sheet is £1.85
It measures 18x12cm and features 43 kiss cut stickers on matte sticker paper, with at least three of each design in various sizes.
Design 1 Die Cut Pack:
This pack is £2.60 and features 42 die cut pieces on quality 210gsm cardstock, in various sizes.
Contains:
Presents (various): 12
Larry the Sprout: 4
Stockings: 4
Snowmen: 4
Christmas Trees: 3
Snowflakes (various): 15
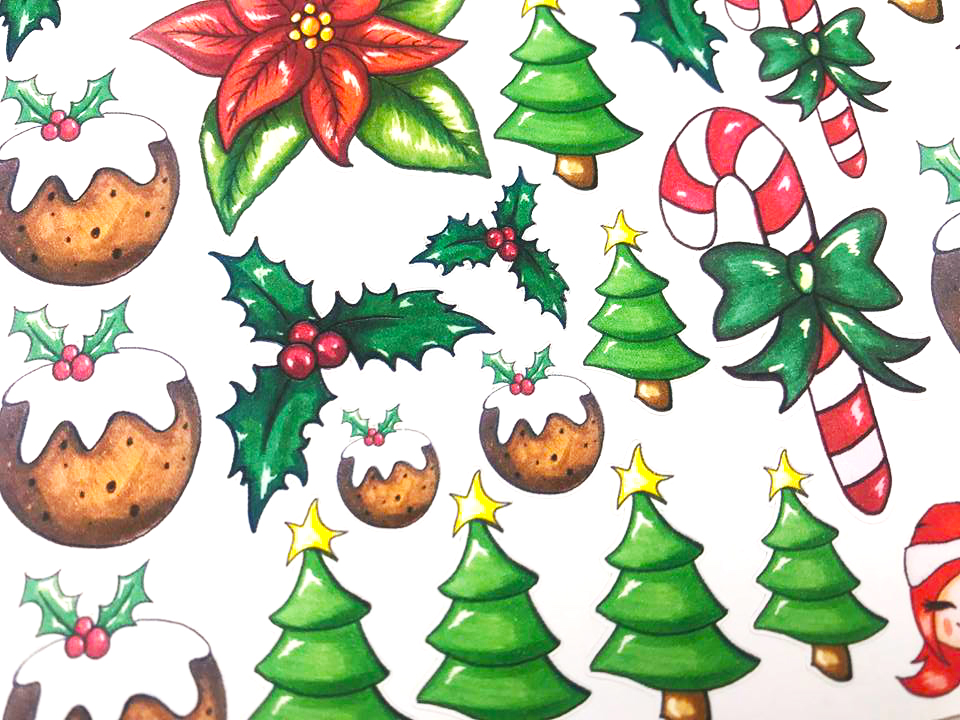
Design Two Sticker Sheet:
This sticker sheet is £1.85
It measures 18.5×11.5cm and features 41 kiss cut stickers on matte sticker paper, with at least seven of each design in various sizes.
Design 2 Die Cut Pack:
This pack is £1.75 and features 15 die cut pieces on quality 210gsm cardstock. There is three of each design, in various sizes.
Alternatively you can purchase all four items for £7.50
All prices are in Pound Sterling. Payment via Paypal only. Postage and packaging is £1 to the UK, or for international customers please email me for a postage quote.
If you would like to purchase simply email me at mspaperlover@outlook.com or use the Contact Form at the top of this page with the following information:
What items you would like
Whether you are UK or international, and a postal/zip code if you are international so I can get you a postage quote.
The email address you use for your PayPal account so I can send you an invoice
And that’s it! I realise it would be slightly easier to purchase through Etsy or a similar platform, but then I would have to raise the prices to cover their fees – and for now we are just testing the waters!
Info/T&Cs/Disclaimers:
All the designs are my original artwork, do not copy, reproduce, or redistribute
I reserve the right to cancel a transaction at any time for any reason. Any money that has been sent will be refunded if this happens
Due to different monitors and screen resolutions, colours may vary
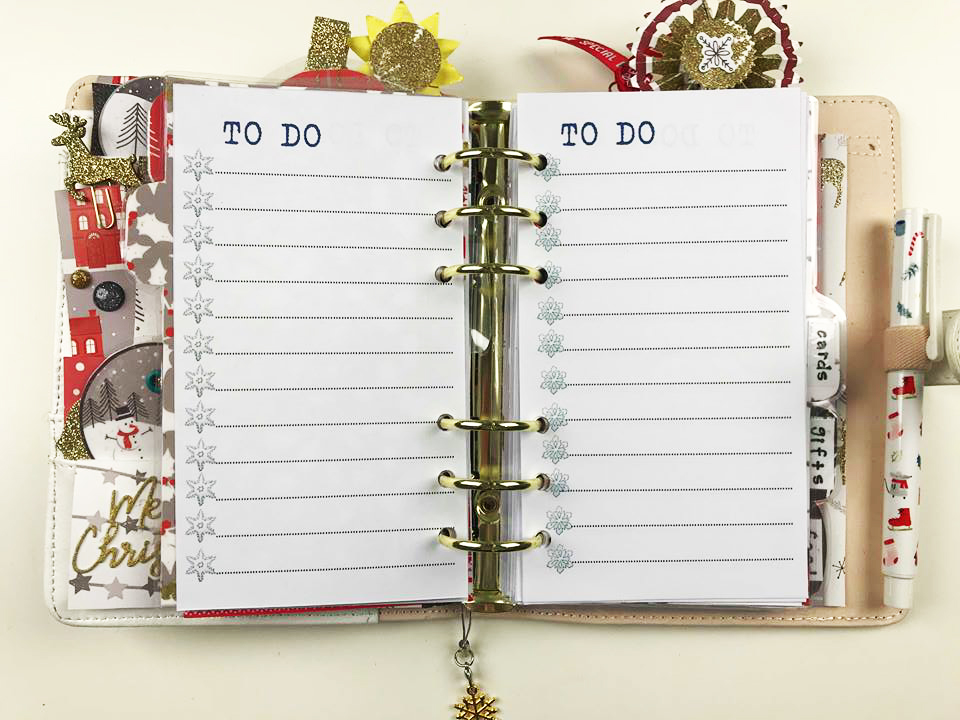
Woop Woop! I’m back again with new Christmas printables for this year. These were really popular last year and I was so chuffed that you all liked them.
So I have redesigned them for 2018, and created some new ones too! Please read the information/disclaimers/terms at the bottom of this blog post before downloading any of the files.
I’ve also created new clip art/doodles for them too (these are all my original artwork).
As for the decoration in my 2018 Christmas planner, I’ve used Dovecraft Festive Wonder. If you’re interested in that, and seeing some more of the inserts and how I plan to use them you can watch the accompanying YouTube video here:
Ok then, onto the inserts! I recommend using at least 100gsm paper to print these onto. They are designed to print double sided onto A4 paper (if you are in the USA then I *think* they’ll work on Letter size but I don’t have any to test). To print double sided select ‘flip on the short side’ in your printer settings. I also recommend setting your print quality to ‘high’.
There are faint grey lines around the inserts to show you where to trim/cut them.
Just like last year, we start with some calendar pages:
These are for November and December. Click here to download:
Next we have the ‘Busy Day’ pages. These were really popular last year so I’ve kept them very similar, just changed up some colours and the font, and of course added the new artwork!
I also recommend downloading this file which is the Busy Day ‘end pages’ (other wise your inserts will start on the timed page and end on the first page!).
Then is the all-important Christmas card pages – I always lose track of how many cards I need to send and who to send them to, so these inserts are an absolute must for me. The picture shows the inserts designed for those who make their cards, but you can also download one that is designed for those who buy their cards.
Now onto the gift/present trackers – the MOST important inserts for me. I always get carried away at Christmas and keep buying more and more presents for people – and forget about others (oops!). So these inserts help keep me in check.
First is the online orders tracker (because I do at least 70% of my Christmas shopping online!).
Then the all-important gift trackers, these are available with different currency symbols for your totals (I’ve done Pound Sterling, Dollars, and Euros, I’m sorry if that doesn’t cover your currency but I can’t make them for every single one in the world!)
(I’m aware the left side insert in this picture has an awkward font issue with the word ‘delivered’ going over two lines, I’ve since fixed that for the printables!)
And lastly for the gift section is an at-a-glance gift tracker. I love my gift tracker inserts but when you just need to look quickly to see what needs to be done they can be a bit of a faff to search through, so I created this one as an extra:
The last section is the food section (what’s more important at Christmas than food?! Ok, family and friendship and spending time together and whatnot… but also FOOD!).
First are the recipe pages. Just like with my note pages I like these to be blank so I can write wherever on them, but again, you can always print them on lined or grid paper if that’s what you prefer.
And for the very last insert for this year, the all important Shopping List. I’ve put mine in my ‘food’ section as that’s mainly what I’ll use them for, but of course they can be used for any Christmas-related shopping.
And there we go! Phew! I really hope you like this year’s inserts, and if you do download them I’d absolutely love to see what you do with them, so feel free to tag me on social media, or even email me pictures!
I also have a giveaway running on my YouTube channel until the 10th November to win some of my Christmas clip art in sticker and die cut form:
So head to the video linked at the top of this blog post to enter (please remember to read the giveaway rules in the description box!).
Now, unfortunately, is time for the boring part; but it is a necessity when offering things like free printables, so please give this a read:
These free printable downloads are solely intended for personal use, and are not to be copied, redistributed, or sold in any way.
The images in the inserts are all my own artwork, so please do not copy, or distribute them. Additionally do not remove them from the original files. Changing the inserts to suit your size planner is fine but using the images for any other purpose is not.
I take no responsibility for anything that may happen to your computer, tablet, printer, printer paper, scissors, paper trimmer, any other object, item, or living creature, or life in general, after downloading and printing these inserts.
If you do use the inserts and share them on any form of social media, please either tag me or link back to this blog. Even if you resize them, they are still my original work. Plus I’d love to see what you do with them!
Well… at least they’re MUCH shorter than Apple’s terms and conditions! If you have any problems with printing these, or any questions then feel free to email me (there’s a contact form linked towards the top of the page), and I will do my very best to help; but please keep in mind I am not a technological expert!
Thanks so much for reading, and best of luck in your Christmas Planning!
I also love sugar skulls – and there’s lots in this paper pad! So I decided to create this Sugar Skull snail-mail flipbook, with pockets and envelopes to fill with goodies to send to a penpal. Here’s a quick video of the flipbook, then I’ll go over each section in detail:
(apologies for the annoying portrait mode, but the video was filmed for instagram!)
To create this flipbook I started with this cut file from the Silhouette design store. I offset it by a few mm, and added a rounded square shape to one side to be the ‘join’ between each section. Then I cut both the outside shape and the sugar skull itself six times on different papers from the pad. The shapes were backed together to make them sturdy, and I glued the sugar skull on four of the pages (saving two for future projects).
For the front I created a shaker pocket. I went back to the Silhouette design software, took that skull shape and made an internal offset of about 0.5″. I used that to trace over foam (twice) and glued those to the base. I used the shape again to trace over acetate, then adhered that to the shape with strong tacky glue. With the foam in place (and the glue dry) I added a mix of sequins (including skull sequins), coarse glitter, and microbeads, then again with the strong glue, adhered the acetate piece on top of the foam.
Oh, before all this I also drew around the sugar skull’s features with a white gel pen so it would stand out behind the sequin mix.
To finish I added the ‘Hi’ at the top – letters made with the WE R Memory Keepers Mini Alphabet Punchboard, a fussy cut sugar skull from the 12×12 paper pad, and a stamped, embossed, and then fussy cut sugar skull made with a Dovecraft Stamp. I finished with lots of Simply Creative gems around the edge and in the letters.
When you open up the flipbook this is what you see on the inside.
This is the first page you see when you open the flipbook. With the sugar skull in place I coloured the teeth with a white gel pen. Then added Simply Creative 3mm Rainbow gems around the eyes and nose. Then created a tiny envelope with the WE R Memory Keepers Envelope Punch Board, and adhered it in place.
For the second page, when I glued the sugar skull down, I did not add glue to all of it, I left a section at the top so that I could use the space as a pocket. I created another envelope with the punch board to slot into this space. I added Simply Creative 6mm rainbow gems to the teeth, created a faux stitching effect around the eyes and nose with a black 0.38mm gel pen, then added small fussy cut skulls to the centres of the eyes.
When I was glueing the skull shapes together at the beginning of the process I decided one could be used as a pocket. So for this one I added glue only to the edge at the sides. I used the inner piece after cutting the shape for my shaker pocket on the front and adhered that. Then created a tall envelope to add onto here, which is kept closed with brads and twine. The three skulls were fussy cut from the 12×12 paper pad. Lastly as there was another ‘join’ sticking out, I decided to create yet another envelope to stick onto that. I also decorated the other side of the envelope with a simple banner shape and another skull, but I seem to have forgotten to take a photo of that, whoops! I added Distress Oxide in Black Soot around the edges of the envelope.
When you flip the book over this is what you see. The page on the far left I decided to keep simple, I added faux stitching again with a fine point gel pen around the teeth, nose, and eyes, and added more fussy cut skulls in the centre of the eye – those also had Black Soot Oxide added around the edges to help them stand out.
For the final page I had another skull shape to use (made somewhere in the process of using the silhouette, there was some trial and error in creating the shapes!). I added the stamped, embossed, and fussy cut skull, and finished with more rainbow gems all around the edge of the skull shape.
Remember to check Trimcraft’s The Craft Blog for more ideas and inspiration with this collection, as well as all the other beautiful collections from Trimcraft. I also have process videos with Trimcraft collections every Tuesday on my YouTube channel (there’s a link at the top of this page underneath my logo).
This post contains some affiliate links, which mean if you purchase after clicking on these links I get a tiny percentage of the sale, at absolutely no extra cost to you.
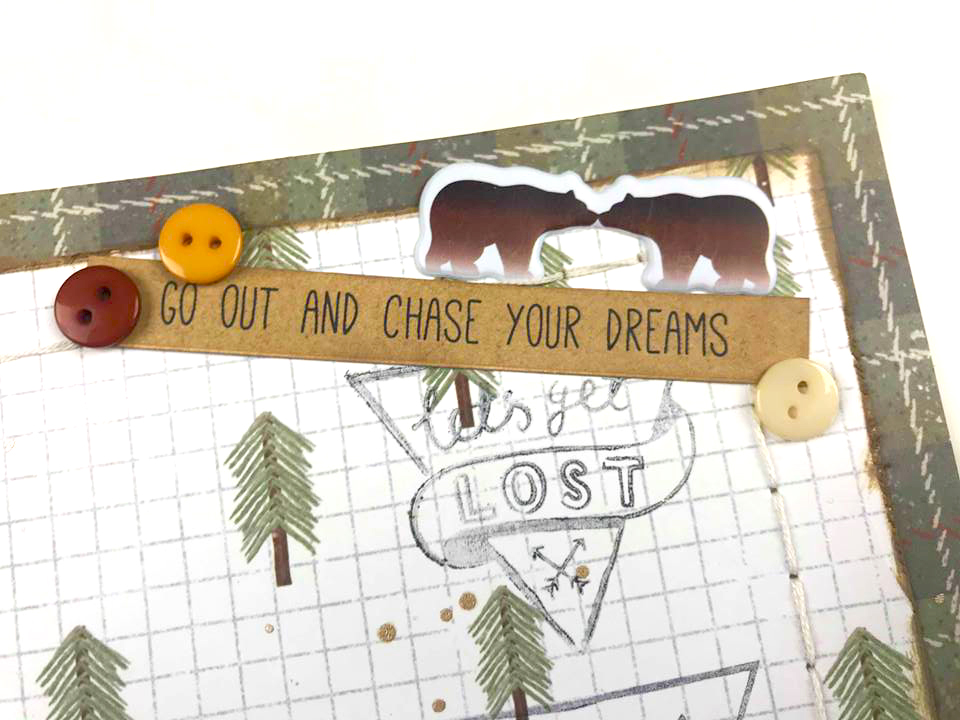
Sometimes layouts come together really fast – even though you’ve done minimal preparation or planning. This was one of those layouts. I did the initial stages: I cut the tree shape on my silhouette – chose my paper, then decided it needed a darker border, so did that, adding Distress Oxide in Frayed Burlap around the edge, as well as using the Dovecraft distress tool. I stitched around the edge of the main paper, which admittedly took some time but I was also watching something on Netflix at the same time which probably made it take a little longer…
but yes, after those initial things, and still with no real plan for the layout, everything just fell into place. I really do love it when that happens.
The process video can be watched here:
Almost everything used is from the Lost & Found collection – apart from the aforementioned Oxide, some Distress Stain in Tarnished Brass, and the phrase sticker in the top right, which is from my stash. It may possibly be an old Kaisercraft something, but I’m not 100% sure.
Note: If you think the stamping looks a little faded – it’s on purpose. I decided to go with second generation stamping for a more muted effect.
Oh, I should add: the bear and the compass around the photo cluster were embellishments I’d made previously for other projects by adding oxides to cardstock, stamping the images (which are from the collection) over the top with StazOn ink, then fussy cutting them out.
Puffy stickers and buttons from the collection were my main go-tos for this layout, but I used a fair few other bits too. One thing that was totally spur of the moment was adding the washi to strips of card stock, cutting the card to size, then adding those strips the layout. One up the right side and one under the photo cluster. Totally unplanned, but I ended up really liking it.
Then towards the end I wasn’t totally happy with that washi up the side, so added some of the twine from the collection next to it. It’s adhered at the back with washi, but I stapled it on too, just to stop the twine from going too astray!
And there we have it – more info is in the process video, plus links to the collection and other items used. Thanks so much for reading ❤
In this post I’m going to be showing you how to make this fun, but incredibly simple banner cut out card. I’m not good with fancy-fold cards (my brain isn’t mathematical enough!), but I do occasionally like to make cards that are just a *little bit* different.
To make this you will need:
an 8×8″ paper pad (or larger). I used First Edition’s new release, ‘Let’s Celebrate’ for mine
A sentiment stamp, and decorative stamps if desired too
Heat Embossing Equipment (ink, powder, heat tool)
Ink Pad
5×7″ white card blank (or white cardstock large enough to make your own)
Banner Die 3 x 4.5″ (7.5 x 11.5cm) – if you don’t have this then don’t worry too much!
To Start:
Die cut two banner shapes. If you don’t have the die (my set was from The Works but they don’t seem to have them available online right now), then not to worry! It’s a very easy shape to cut yourself, just use the measurements listed above.
Back each of your banners on a contrasting paper and cut around leaving a border of a few mm. If you have the appropriate sized die you can just cut that and use it to back the original shape, but I find it easier to do it this way!
Attach the banners to your 5×7″ card blank (I go for double sided tape as my adhesive, but use whatever your preference is). Make sure each banner is at the very edge of the card at the left edge and then on the top and bottom edges.
Cut around the banner shapes using scissors or a craft knife, again, whichever your preference. Be careful to only cut through one layer of card and not the back too!
Cut another contrasting paper to just under 5 x 7″ and attach to the inside of the card.
And that’s it for the card shape! You can now decorate however you wish, but I’ll show you how I did mine to give you an idea.
Stamp and emboss a sentiment on a paper scrap, about 2-2.5″ wide (about 5cm).
Cut the paper you’ve stamped into a smaller square or rectangle, back with a contrasting paper leaving a 2mm-ish border, then attach to a longer, but slightly narrower strip of paper.
Attach to card and finish with some stamping!
It is up to you whether to attach your decorative piece to just one or to both banners, if you attach it to just one then the banners can ‘open’ separately, however…
When you make a vertical card – only attach the sentiment/sentiment cluster to the bottom banner. If you attach it to the top banner then gravity will work against you and it will droop!
This card shape also works great horizontally:
How super easy is that?! You can then write your message on the inside of the banners or on the back of the card.
If you’d like to see some more projects with Let’s Celebrate, then check out the Inspiration Area of Trimcraft’s The Craft Blog.
this post was originally posted on http://mrsbrimbles.blogspot.co.uk/
This month I was super excited to receive the Planner Nerd Brights stickers as my D.T. package, as I will be off to Cambs Planner Con in a few short weeks! So I already had the matching stickers that came with my ticket to the event, and now had loads of Planner Nerd stickers to use!
I started by decorating the week of Cambs Planner Con in my personal size planner – I rarely decorate in advance so it felt a little weird but I really like how it turned out.
I did, admittedly, add stickers from my planner con kit, but it’s mostly stickers from this month’s club. There will be a Plan With Video published on my YouTube channel for this, but it won’t be until Sunday 15th (so it’s ready for the relevant week!), so keep an eye out for that 🙂
Close Ups!
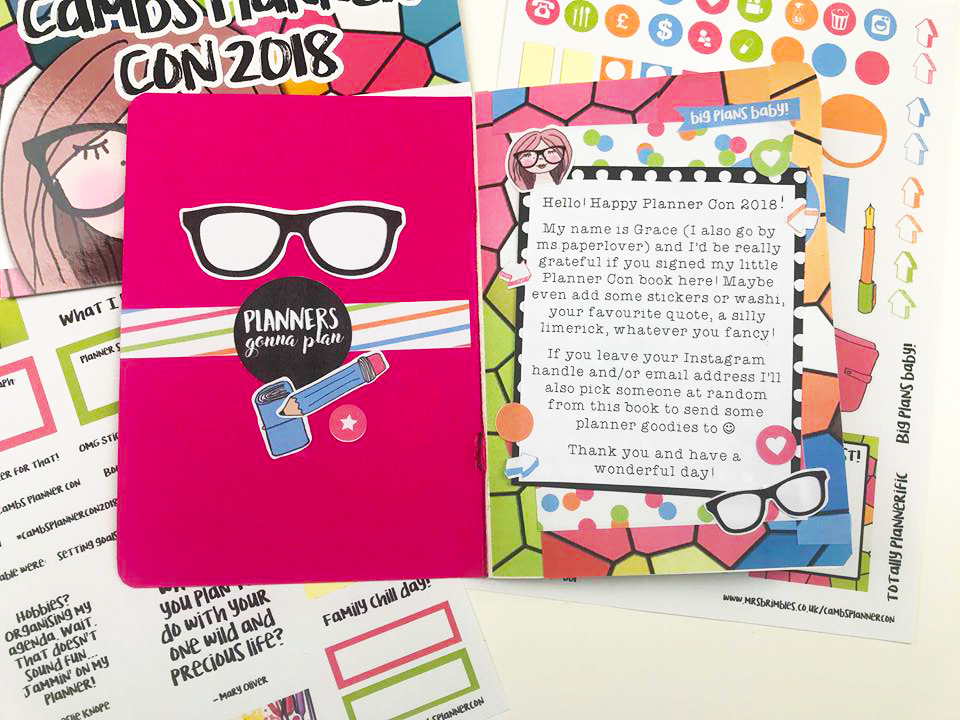
After this I still had plenty of stickers left over, and at first I was a little stumped at how to use them. The obvious way to use them would be journaling (or other forms of memory keeping) Planner Con, but I couldn’t do that before the event! So I had an idea – decorate a little notebook to pass around at planner con, asking people to sign it, and have that to keep as a memento of the day.
Here’s a close up of the front page so it’s easier for you to read the text:
I also used more stickers from the kit to decorate some of the pages inside:
So if you’re going to be at Planner Con 2018, please keep an eye out for my little book! As the blurb says, I’d be ever so grateful if you signed it!
Of course, this kit isn’t just for Planner Con attendees, most of us are Planner Nerds in some form, and these are perfect for anyone who enjoys “jammin’ on their planner” 😛
You can purchase this kit here, there is also the Brimbles Box for this month with the same theme, and you can purchase items separately. And if the Planner Nerd Brights really aren’t your theme, then there is a bonus box and sticker kit this month with an April Showers Theme.
Thanks so much for reading!
Grace ❤ @ms.paperlover
p.s. apologies for any weird formatting in this post – sometimes wordpress and I don’t get along very well!
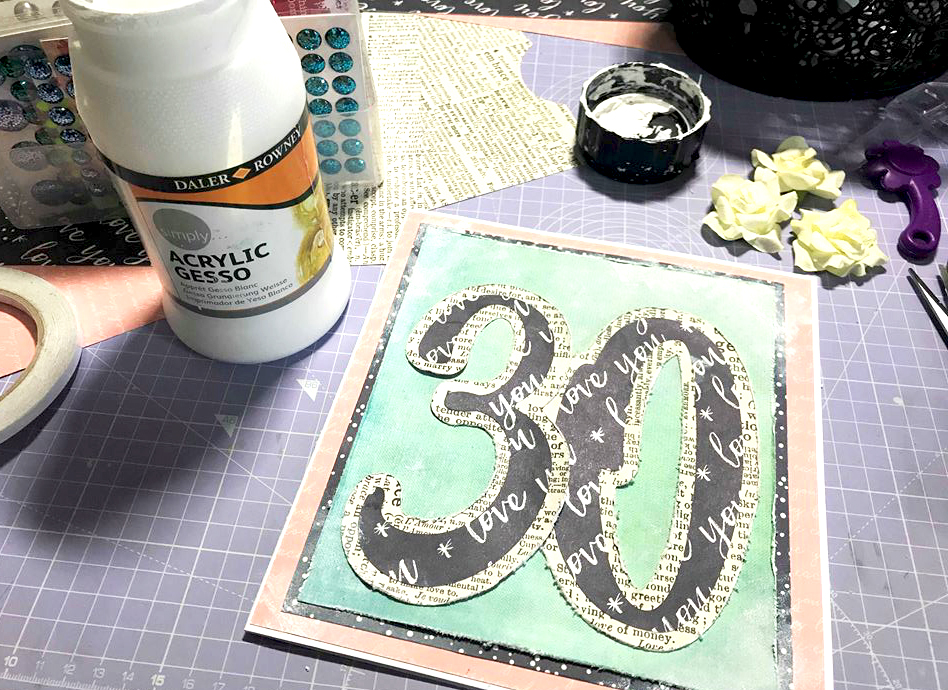
Hi all! I have a post today to show you how to make this pretty mixed media card. Today is my parents’ 30th Wedding Anniversary, which is the ‘pearl’ anniversary, so I wanted to make something with lots and lots of pearls. Of course you could use this style and techniques to make any sort of card you wanted, and use any papers, but I will list the items I used to help you get an idea of what is needed.
I used:
A3 cardstock
First Edition Sweet Nothings 12×12 Paper Pad
Dovecraft Distressing Tool
Paper Flowers, various colours and sizes
Clear Glass Beads
White thread
Flat back pearls (lots!)
White Gesso
3D Gloss Gel/Gel Medium
I wanted to make a huge card, so I started with A3 white card to create my card blank. The card measures 7.5″ by 8″, so you will need to cut a piece 15″ by 8″, and score down the middle to create your card blank.
Matt the front of the card with three contrasting papers, one just under 7.5 x 8″, one 7 x 7.5″, and the front one 6.75 x 7″. Distress the edges of the centre paper.
For the centrepiece, I cut the numbers on my silhouette in the font ‘Beyond the Mountains’. I offset the numbers by about 0.3″ and separated the two cut files so the darker ’30’ could be backed by the lighter one. If you do not have a silhouette or other electronic cutting machine you can print out a template and then draw and cut around it, the shapes are not too complicated so it shouldn’t take too long.
Distress the edge of the larger 30, then adhere as seen in the photo below, so the numbers slightly overlap and so still leave a border of the green paper underneath. Also so there isn’t an awkward bit of green poking out where the number three ‘dips’ inward on the right edge.
Now it’s time for the messy bit, start by lightly sponging some white gesso on the corners of the card:
Gather together all your embellishments ready to put on. I also cut the ‘mum and dad’ with my silhouette with pearlescent paper (PEARLescent, geddit?!).
Add the gel medium (or other adhesive, you basically want something that will dry transparent with a gloss finish) in the first corner you’re embellishing.
Then add the thread, loop it around your fingers, make knots, whatever you like. It will look messy at first but works once all the items are in place and gives a lovely shabby-chic look.
Then start adding the rest of your embellishments! You may need to add more gel as you go. Start from largest to smallest. So I started with the large paper flowers, then the smaller pink ones, then large pearls, medium pearls, etc, and finish with the glass beads and tiny pearls to fill in any gaps.
If adding a small title or sentiment like I did with the ‘mum and dad’ cut, then add this at the very end.
Finish by painting a light layer of gesso over the flowers to help tie them in to the theme of the card – if your flowers are white or ivory you may not need to do this, but mine had a hint of yellow which I wanted to hide.
The gesso layer also contributes to the shabby-chic effect.
You can dry with a heat tool but I find it better with all these embellishments to leave it overnight to dry.
And it’s finished! One thing to remember with this card, make sure you have an envelope, or the equipment to make an envelope, that is big enough, as it is a BIG card!
Thank you so much for reading. If you make your own version of this card then I’d love to see it, so please tag me on social media! Let me know if you have any questions, and if you’re a bit new to or confused by mixed media, then I have a Mixed Media Basics video up on my YouTube channel (it’ll be published a few hours after this blog post), there’s a link to my channel up at the top of this page underneath my logo.